You have opened up a switchboard on a pre-purchase inspection or a maintenance call, and what you find is a mix of the good, the tired, and the plain unsafe. Ceramic fuses on some circuits, no safety switch on the power outlets, a backing panel that looks like it predates colour television. The client wants to know two things: is it safe, and what does it need. A switchboard condition report is how you answer both in writing, with photos, so the conversation is not just a verbal warning that gets forgotten by the weekend.
This guide covers what a switchboard condition report is for, how to work through a visual assessment, and how to record defects and upgrade recommendations so the client has something they can act on and you have a record that stands up.
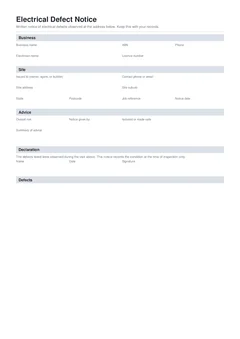
If you are writing one up today, open the switchboard condition report template. Browse more electrical forms, read how to write up faults cleanly in the guide on reporting electrical installation defects, or use the electrical defect notice guide when the inspection finds a fault that needs a formal written notice.
What is a switchboard condition report?
A switchboard condition report is a visual assessment. You are looking at the board, recording what you can see and safely check, and giving the client a plain read on its condition and what work it needs. It is the kind of record that sits behind a quote for a switchboard upgrade, a pre-purchase property check, or a landlord's maintenance file.
It is not a certificate of compliance or a certificate of electrical safety. Those are the statutory documents your state requires when you actually carry out and test electrical work. The condition report does not replace them. If your inspection leads to real work, that work still needs the certificate or notice your state mandates, signed and lodged the usual way.
The relevant reference for assessing an existing installation is AS/NZS 3019, which sets out periodic assessment of installations already connected to supply. It covers assessment by basic visual inspection, by visual inspection with limited testing, and by visual inspection with full testing. A condition report of this kind is built around the visual layer, with the switchboard as the focus. The construction and protection requirements you are checking the board against sit in AS/NZS 3000, the Wiring Rules.
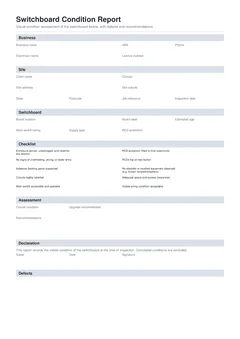
Business, site, and switchboard details
The front of the report is about matching the assessment to the right board on the right site. Get this wrong and a good inspection ends up filed against the wrong job.
Record your business and electrician details, including your licence number, so the report shows who did the work. Then the site: client name, contact, job reference, inspection date, and the board location. On a site with more than one board, the location and a board label are what tell a later reader which board this report covers.
The switchboard section then captures the board's identity and setup so the condition sits in context:
Estimated age. Under 10 years, 10 to 25, 25 to 40, over 40, or unknown. Age is the single best predictor of what you are about to find, and it frames the recommendations.
Main switch rating and supply type. Single or three phase, and the main switch rating. This tells the next electrician what they are working with before they open the board.
RCD protection. All circuits, partial, none, or unknown. Whether safety switches cover the final subcircuits is one of the biggest safety questions on any older board, so it sits up front rather than buried in the checklist.
Fill these in as you go rather than from memory afterwards. The age band and the RCD coverage line are the two facts a client remembers, so they need to be right.
What are the ten visual checks?
The checklist is the core of the report. It is ten visual condition checks, each marked OK, Attention, or Defect. Work through them in order at the board so none get skipped, and remember this is a visual assessment, not a licence to start pulling the board apart.
The checks cover the enclosure and the environment first: the enclosure secure, undamaged, and rated for its location, and no signs of overheating, arcing, or water entry. Discolouration, melted insulation, or a burnt smell around terminals are the ones you do not want to mark OK just to move on.
Then the asbestos check: asbestos backing panel suspected. Older switchboard backing panels and enclosures were made with asbestos, and the safe response is to mark it Attention or Defect, note it, and not drill or disturb the panel. The WA Government fact sheet on switchboard panel repair and asbestos safety is a good reference for why this matters and what disturbing a panel involves.
The remaining checks run through the working parts of the board:
Circuits legibly labelled. A board no one can read is a hazard for the next person who works on it. Faded or missing labels get marked and photographed.
Main switch accessible and operable. The main switch has to be reachable and manually operable so supply can be isolated in a hurry.
RCD protection fitted to final subcircuits, and RCDs trip on test button. Two separate checks. One is whether safety switches are there on the circuits that need them. The other is whether the ones fitted actually trip when you press the test button. A safety switch that does not trip on test is not protecting anyone.
No obsolete or recalled equipment observed. Known recalled breakers and superseded gear that should no longer be in service.
The last two checks close out the board: adequate space and access clearances, and visible wiring condition acceptable. Anything marked Defect here should get a row in the defects section rather than a note buried in the checklist.
Recording defects with photos
Every checklist item you mark Defect earns a row in the defects section. This is where the report stops being a tick sheet and becomes evidence. A row captures the defect, the risk it carries, the recommendation, and photos.
Rate the risk on each defect: Low, Medium, High, or Extreme. This is what lets a client, a property manager, or a buyer sort the list into what needs doing now and what can wait. An unprotected power circuit and a faded label are both defects, but they are not the same urgency, and the risk rating is what says so.
Photos are the part that carries the most weight later. A photo of the burnt terminal, the ceramic fuse bank, or the suspected asbestos panel does more than any written description to show the client what you found and why the recommendation follows. Attach them to the defect row while you are standing at the board, not from memory in the ute afterwards. Defect rows are optional, because a board can genuinely be sound, but any row you add has to be complete.
Overall condition and upgrade recommendations
After the checklist and defects, the report asks for the overall condition of the board and the recommended work. This is the summary the client reads first even though you fill it in last.
Overall condition is a single call: Good, Fair, Poor, or Unsafe. Back it with the recommendation. If the board is Poor or Unsafe, or if you are recommending an upgrade, spell out what that means: safety switches on the final subcircuits, replacing rewireable fuses with circuit breakers, a non-asbestos panel, or a full board replacement where the age and condition justify it. The Wiring Rules restrict replacing a rewireable fuse with another rewireable fuse, so a board still running ceramic fuses is a common driver of an upgrade recommendation.
Keep the recommendation about the work, not a sales pitch. A clear, ranked list of what the board needs is more persuasive to a client than pressure, and it is the part they will show to whoever pays for the work.
Sign the report before you hand it over
The declaration is you standing behind the assessment. Your name, the date, and your signature go on once the checklist, defects, condition, and recommendations are all in and correct. A signed condition report is a record with your licence attached, so it only gets signed when the entries reflect what you actually found.
Hand the client their copy and keep one with the job. If the report leads to work, that work gets its own certificate or notice under your state's rules, and the condition report sits alongside it in the file.
How Tradie Forms helps
Tradie Forms turns the switchboard condition report into sections you work through one at a time that follow the order you work the board: business and site, the switchboard setup, the ten visual checks, defects with photos, then condition and recommendations. You are not reformatting a spreadsheet at the end of the day.
Your business and licence details are saved and reused, so the electrician and contractor fields are not retyped on every job. You attach a photo to each defect row as you go, mark the risk, and the form flags missing fields before you download, which is what catches the checklist item marked Defect with no matching defect row, or the blank condition call, before the client does. You preview your entries mapped onto the official PDF layout, then download the finished report to hand over and store with the job.
Tradie Forms maps your entries onto the layout. The licensed electrician still checks the work, the assessment, and the downloaded PDF before it goes to the client.
Start the switchboard condition report template at the board, or browse more electrical forms for the rest of your paperwork.
For how the report reads months later, see what insurance assessors scan first in a switchboard report.
Official references
Check AS/NZS 3000:2018 Electrical installations (Wiring Rules) for switchboard construction and protection requirements, AS/NZS 3019:2022 Electrical installations - Periodic assessment for how existing installations are assessed, the WA Government switchboard panel repair and asbestos safety fact sheet for handling suspected asbestos panels, and the Energy Safe Victoria electrical safety checklist for a regulator's inspection reference. Requirements and licence conditions vary by state, so confirm the current standards and your own authority before you certify any work that follows.